What Monit?
Let me explain about the utility. It has the ability to start a process if it is not running, restart a process if not responding and stop a process if uses high resources. In simple words it’s a helpful program that automatically monitors and manages server programs/resources to ensure that they stay online 24/7 while maintaining the correct file size, checksum and permissions. It’s important system monitoring tool anyone would like to have in their mission critical systems. With the web interface given you could see what’s going on with your system. In this article I’ll be covering end-to-end and providing you value links to be bookmarked in your browser(tongue-out-face).

Why?
It can do a lot more than you think, it can do maintenance as well as fix the errors in an error situation in below sections.
- Proactive
- Processes
- Files, Dirs and Filesystems
- Cloud and Hosts
- Programs and scripts
- System
For more info on above sections please refer this link. Also check out it’s design philosophy here.
Installing
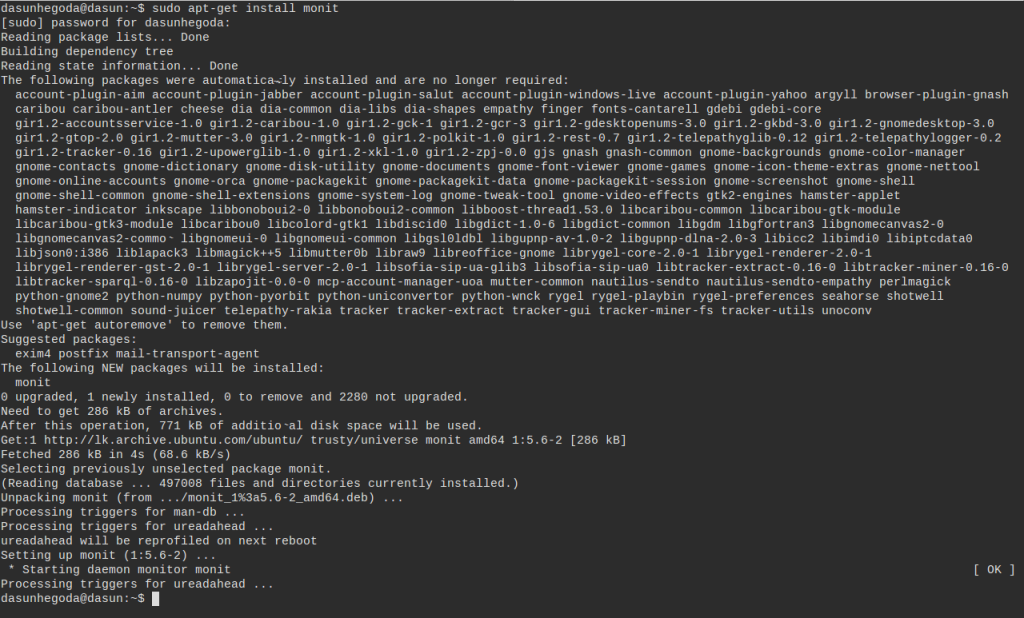
Let’s apt-get to install. Beauty of linux right(happy-face).
sudo apt-get install monit

Okay now time to check whether it’s running. Type the below command.
monit status
Most probably just like me you should get the error below.

Let’s fix it by editing monitrc file.
sudo vim /etc/monit/monitrc
now uncomment below lines starting from line 118.
set httpd port 2812 and
use address localhost # only accept connection from localhost
allow localhost # allow localhost to connect to the server and
allow admin:monit # require user 'admin' with password 'monit'
allow @monit # allow users of group 'monit' to connect (rw)
allow @users readonly # allow users of group 'users' to connect readonly
now you will able to access the monit web interface by navigating to the http://localhost:2812. Also try monit status which will give the below output.

Configuring
Configurations can be specified in the /etc/monit/monitrc file or using individual files in /etc/monit/conf.d/ directory. In this article, I’ll be using monitrc.
edit /etc/monit/monitrc. In the file as you can see By default, it is set up to check that services are running every 2 minutes which should good enough for you. You can change that according to the criticality of the system. We’ll be using basic configurations. As always you can dive in more. Let’s add below lines to monitor Apache and MySQL.
Below is to configure Apache web server.
check process apache with pidfile /run/apache2/apache2.pid
start program = "/etc/init.d/apache2 start" with timeout 60 seconds
stop program = "/etc/init.d/apache2 stop"
Below is to configure MySQL server.
check process mysqld with pidfile /var/run/mysqld/mysqld.pid
start program = "/etc/init.d/mysql start"
stop program = "/etc/init.d/mysql stop"
monit -t to check whether the configurations are correct.
sudo /etc/init.d/monit restart
You can verify that monit service is started by checking log file.
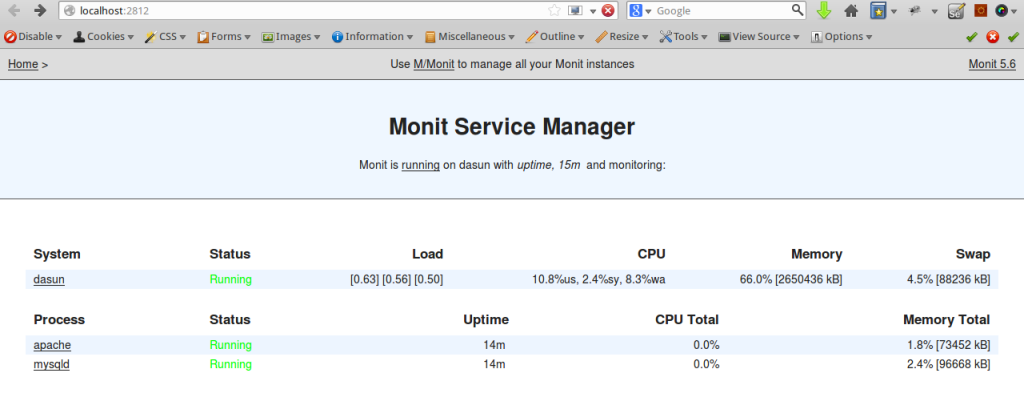
Now log into the web interface by navigating to the http://localhost:2812. All must be good as shown below.

Also check out logs as well.
sudo tailf /var/log/monit.log
if you are worrying about other configuration such as NginX, SSHD, PostgreSQL etc you can refer Real-world configuration examples. Documentation contains all the configuration in the world you need. If you have any questions let me know in the comments below. Your feedback is highly appreciated(happy-face).
![]()


